

When a solar street light is off, dim or shutting down early, do not replace the LED or battery immediately. Diagnose the system in order: solar generation, battery storage, controller and sensors, wiring, then the LED and optics. One failed pole suggests a local component or connection problem; several simultaneous failures may indicate weather, programming, installation or batch-level causes. Isolate electrical energy and follow the manufacturer’s safety procedure before opening any enclosure.
A 5-Minute Preliminary Diagnostic Checklist
- Is one light affected or a whole group?
- Does it switch on briefly after dusk?
- Does it turn off before dawn or remain dim?
- Is the panel dirty, damaged or newly shaded?
- Are controller indicators or error codes abnormal?
- Are accessible cables and connectors loose, corroded or wet?
Recent cloud can reduce charging, so compare symptoms with the cloudy- and rainy-day performance guide before concluding that a part has failed.
Preventive Maintenance Schedule
| Interval | Typical check | Warning sign |
|---|---|---|
| Monthly/site-dependent | Visual operation, vegetation, debris, obvious damage | Repeated early shutoff, shade or impact |
| Every 3–6 months | Panel surface, brackets, connectors, pole access | Soiling, looseness, corrosion or water |
| Annually | Logged runtime, battery/charging data, fasteners, seals, optics | Declining trend or mismatched settings |
| After severe weather | Pole alignment, panel, enclosure, wiring and foundation area | Movement, cracks, flooding or cable strain |
Frequency must reflect local dust, snow, vegetation, salt, storms, traffic and manufacturer instructions. DOE solar O&M guidance emphasizes preventive inspection, debris control, records and post-event checks.
Troubleshooting by Symptom
| Symptom | First checks | Possible causes |
|---|---|---|
| No light | Day/night sensor, controller status, connectors, battery voltage | No charge, protection state, wiring or controller fault |
| Dim light | Program, panel shade/soiling, battery state, optics | Dimming mode, low energy, dirty lens or LED/driver issue |
| Off before dawn | Recent weather, hourly profile, battery trend | Undersizing, aging battery, unexpected load |
| Flicker | Connections, driver output, controller events | Loose/corroded contact, driver or control issue |
| On during day | Sensor exposure and settings | Covered/damaged sensor or configuration error |
| Group failure | Shared weather, settings, installation date, batch | Systemic configuration, environment or batch issue |
Solar Panel Inspection and Cleaning
Check dust, leaves, bird droppings, snow, surface damage and mounting movement. Vegetation or new construction may create shade that did not exist at commissioning. Use safe access, clean only by an approved method and avoid abrasive tools. Never assume cleaning is required on a fixed universal schedule.
Compare the panel with its commissioning photographs and electrical baseline where available. Look for cracked glass, delamination, damaged junction boxes, loose clamps and cable abrasion. A clean panel can still underperform if its orientation has shifted or a connector has developed resistance. Record the finding before cleaning so the team can distinguish a soiling problem from an electrical one.
Battery Inspection and Replacement
Review runtime and charge history before replacement. Qualified technicians should check voltage and, where appropriate, capacity under the manufacturer’s method. A replacement must match chemistry, voltage, controller settings, dimensions, connectors and environmental requirements. Battery intervals are project-specific; review battery service-life practices and the broader solar street light lifespan guide.
Controller, Sensor and Wiring Checks
Record indicator codes before cycling power. Confirm time program, day/night threshold and motion/radar response. Inspect accessible connections for reversal, looseness, damaged insulation, corrosion and water ingress. Only trained personnel should isolate and test energized circuits.
Compare settings across identical poles. A replacement controller or accidental remote-control change can create different behavior even when the hardware is healthy. Preserve the approved configuration in a controlled file and record every authorized change. If water is found, identify the entry path and damaged components; drying the enclosure without correcting the seal or cable route is not a durable repair.
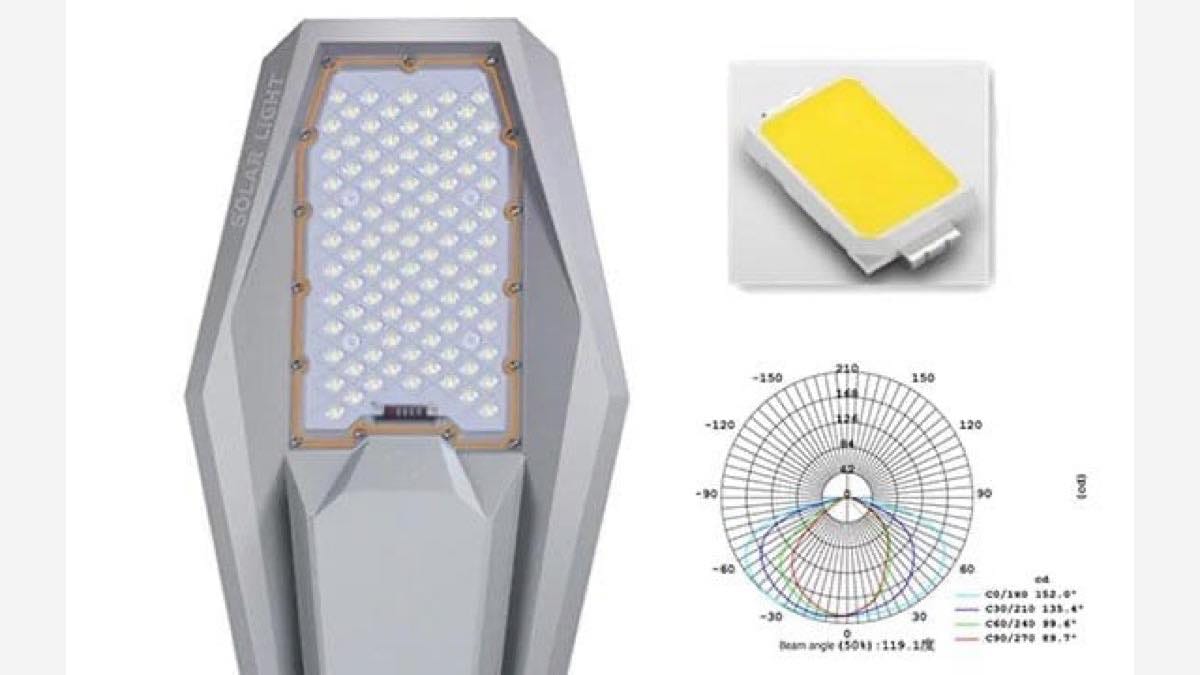
LED Module and Optical Checks
Look for partial LED failure, driver faults, damaged or yellowed lenses, condensation, loose optics and blocked heat-dissipation surfaces. Compare with a known normal unit of the same model and settings. Cleaning a lens will not solve low battery energy, and replacing an LED will not solve incorrect programming.
Maintenance Records and Spare Parts
Assign each pole an ID. Record model, installation date, battery/controller identification, settings, fault history, photos, weather, readings and corrective work. Batch projects should hold agreed critical spares—such as model-matched controllers, connectors or service modules—based on lead time and warranty policy. The commercial solar street light range can help identify product families, while exact spares must follow the supplied model.
Trend records are more valuable than isolated values. Compare runtime, charging behavior and repeat faults by season and pole group. This can reveal growing vegetation, a common installation defect or a configuration that is marginal only in the weakest solar month. Close work orders with the cause, action and post-repair test instead of recording only “battery changed.”
Safe Troubleshooting Workflow
Start from observations that do not require opening equipment. Review time, weather, shade and controller display; then follow the manufacturer’s isolation sequence. Use appropriate access equipment and traffic control, verify absence of hazardous energy where required, and prevent unintended reconnection. Do not bypass battery protection or substitute a different voltage for a quick test.
After corrective work, repeat the original failure condition where practical. A daytime lamp test alone does not prove overnight runtime. Confirm charging, dusk transition, programmed dimming and pre-dawn operation, then update the maintenance record and any spare-part inventory.
Building a Site-Specific Maintenance Plan
Divide tasks into owner observations and qualified technical work. Site staff may report shade, damage and operating time; trained technicians handle electrical measurements, internal connectors, battery isolation and structural issues. Define response priority for dark intersections, pedestrian areas and multiple simultaneous failures. Include supplier contacts, model documents, warranty steps and safe disposal routes for replaced batteries or electronics.
When to Contact the Manufacturer
Escalate repeated protection events, programming problems, batch failures, water ingress, structural damage or warranty defects. Send the model, serial/pole ID, installation date, photos, indicator codes, readings and recent weather. For remote projects, plan this process before deployment using the rural and remote-area guide.
Set measurable triggers instead of vague instructions. Examples include repeated pre-dawn shutdown, visible pole movement, a damaged seal, an abnormal controller code or a documented decline from the commissioned baseline. Each trigger should state who inspects, what evidence is collected and when the issue is escalated.
Plan access before a fault occurs. Record lift or ladder requirements, traffic control, keys and enclosure tools, safe isolation points and spare-module locations. Where a site contains several product generations, keep parts and controller files clearly separated. Review the plan after storms, site construction or vegetation changes.
Troubleshooting Without Losing Evidence
Avoid repeatedly resetting a controller before reading its status. Photograph indicators and wiring, note time and weather, and record voltage only when qualified. Swap parts under a controlled method: label the original component, change one variable at a time and confirm the result. Otherwise, temporary recovery can hide the root cause and create unexplained spare-parts expense.
For batch faults, preserve samples and serial information. Compare affected and unaffected poles, installers, production lots, settings and site zones. Contact the manufacturer before modifying equipment that may be under warranty. A structured record helps distinguish product, installation, environmental and maintenance causes.
Close the investigation only after the repair survives an appropriate operating cycle. Record post-repair charging, dusk transition, programmed modes and pre-dawn status. Where the original fault followed several cloudy days, a short clear-weather test is useful but not equivalent to validating the low-sun condition.
Frequently Asked Questions
How often is maintenance needed?
Set intervals from the environment, product instructions, risk and observed condition—not one universal calendar.
Why is the light not working?
Check charging, battery protection, controller/sensor status, wiring and LED functions in sequence.
Why does it turn off after a few hours?
Possible causes include low charging, changed programming, battery aging, unexpected load or undersizing.
Can the battery be replaced on site?
Only when the design permits it and a qualified technician has the correct replacement and procedure.
Do panels need cleaning?
Inspect first. Clean when soiling materially affects collection and only by an approved safe method.
Request Technical Troubleshooting Support
Send the model, installation date, symptom, controller indicators, daytime and nighttime photos, available readings and recent weather. This evidence supports diagnosis before parts are changed.